¶ Podium user guide
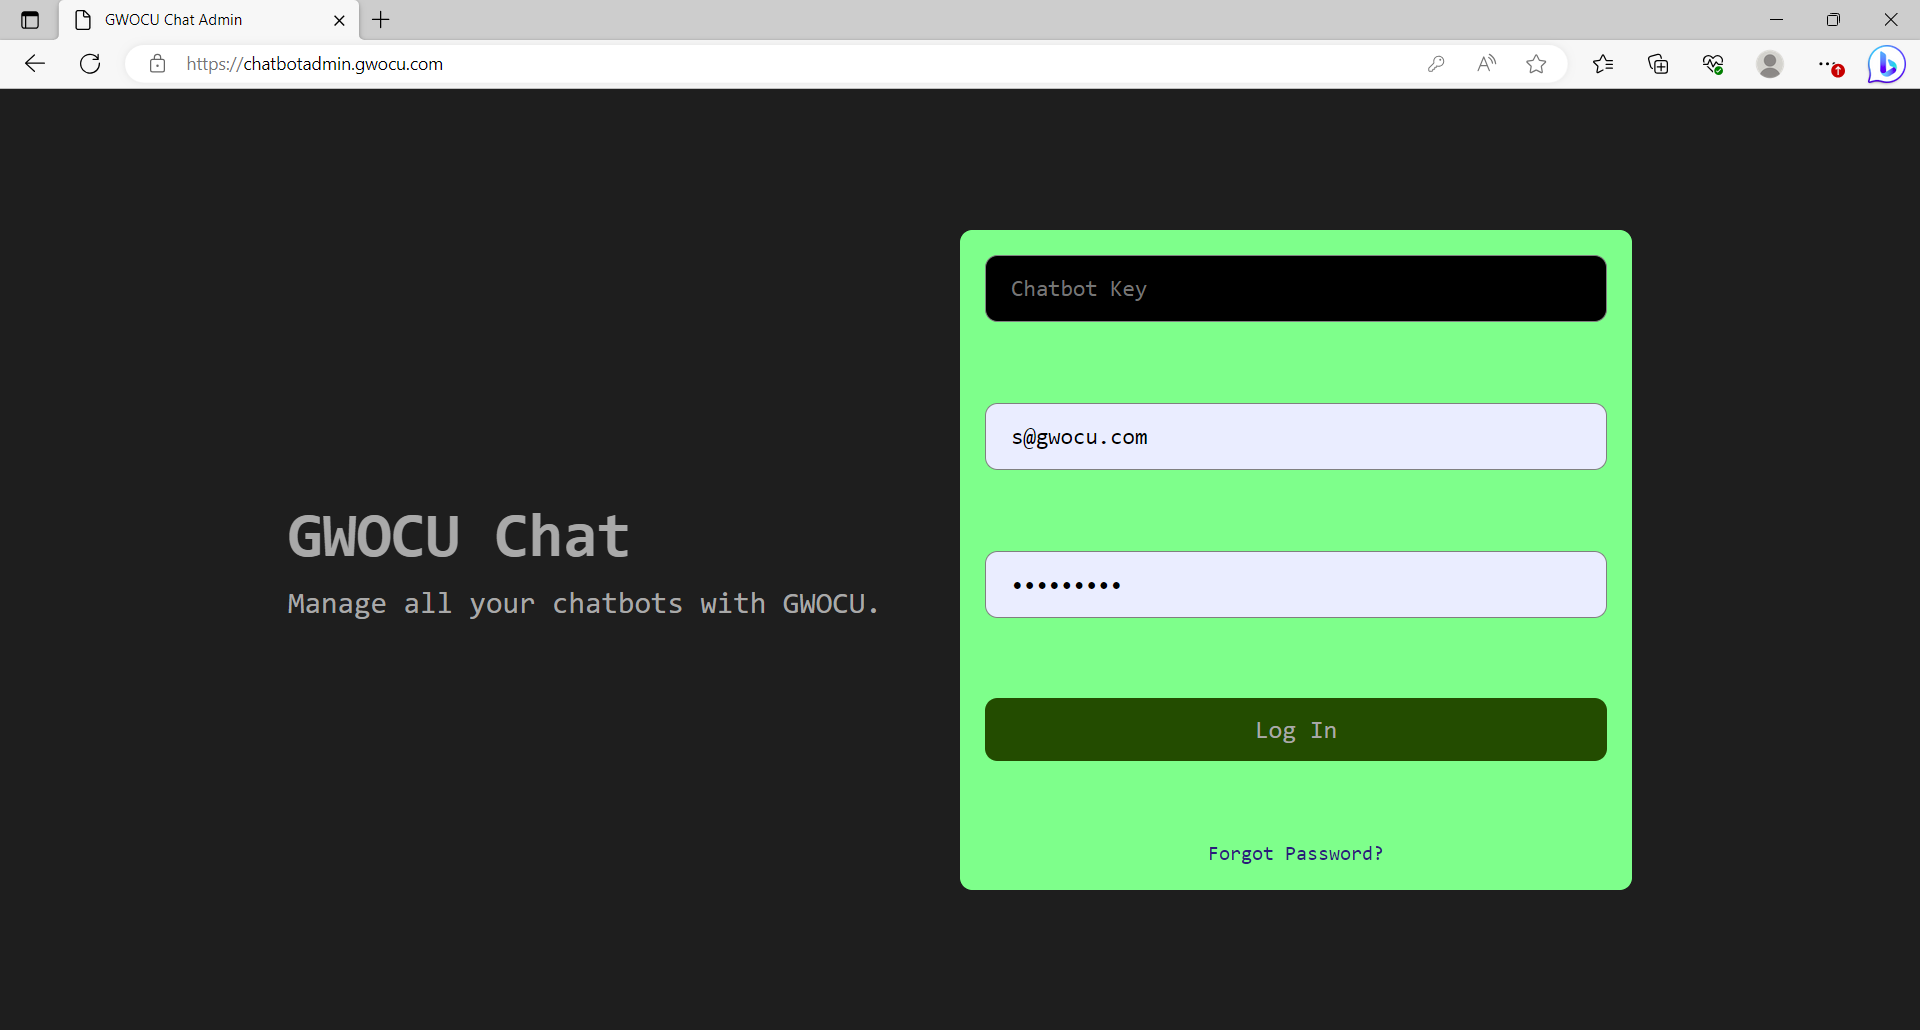
If you have purchased an AI services plan at GWOCU you will have received sign in credentials for the the chatbot podium Module through email. If you navigate to the URL provided, you will see the sign in page displayed.
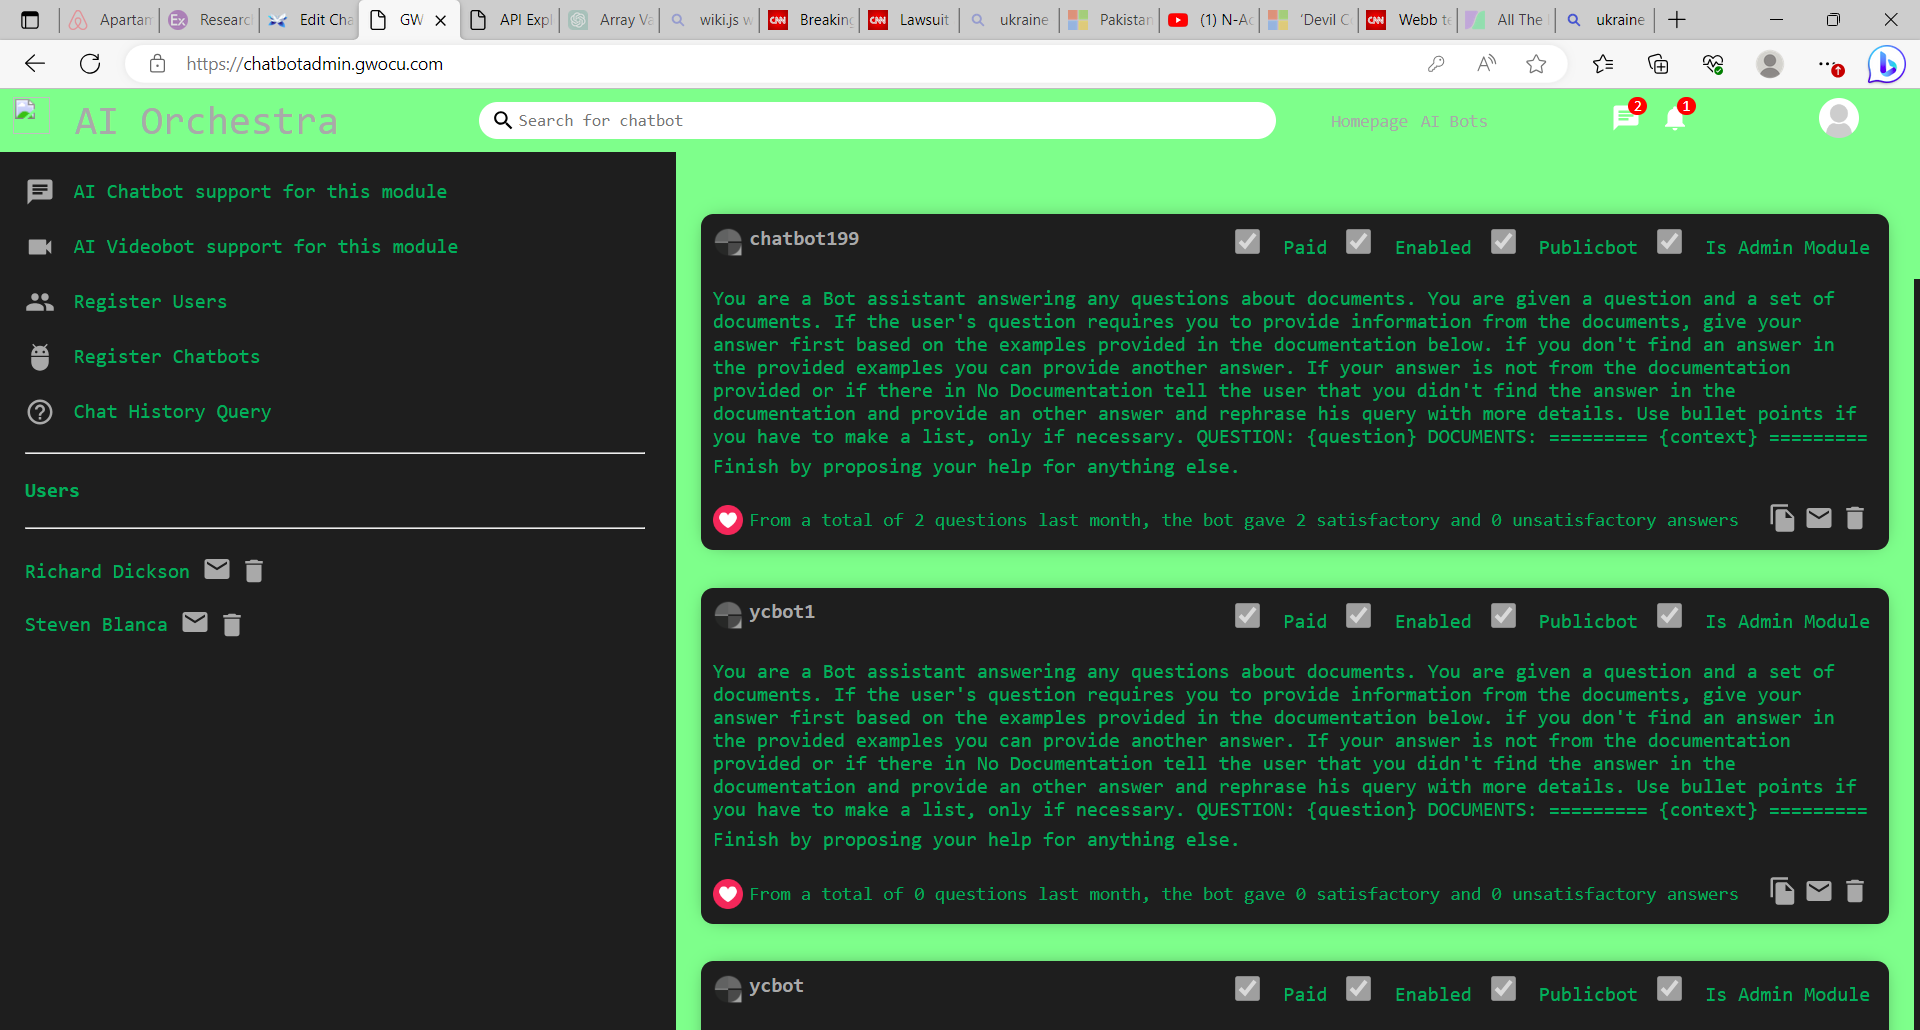
By default you will see only one chatbot diplayed in the console. This is the default chatbot. Depending on your purchased plan you may create more chatbots.
¶ Sign In
When you navigate to the URL provided to you through email you will see the following page:

Please enter your credentials on the page to gain access. Once you have signed in, you will not need to sign in anymore. A sign in token will be saved in your browser's local storage space.
¶ Layout

Left panel
AI chatbot support for this module: This enables the user to chat to the the default chatbot. Note that the default chatbot must be trained first or you will only get answers from the openAI knowledgebase.
AI videobot support for this module: This enables the user to chat with a live avatar of the default chatbot. Note that it must be trained first or you will only get answers from the openAI knowledgebase. This option is not implemented yet and is reserved for a future version. Consult our roadmap for further details.
Register Uses: This option is to register users for the default chatbot. Please see below for fulll functionality.
Register chatbots: This option is to register more chatbots. Please see below for full functionality.
Chat History Query: This option is to query chat history for the default chatbot. This option is not implemented yet and is reserved for a future version. Consult our roadmap for further details.
Users: Dsplays a list of existing users for the default chatbot
¶ Central Panel
In the central panel you can see the list of chatbots that were created either by default or by a user. Each chatbot has options on the right below to train the chatbot, email the admin user the credentials to login and an option to delete the chatbot.
Train the chatbot (documents icon)
The chatbot can be trained on your own company documentation using this option. When clicking on this icon the user will be presented with the following screen:
Email the admin user (email icon)
When a chatbot is created an admin user is also created with some preset credentials. These credatials can be mailed to the user using this option.
Delete and existing chatbot (waste basket icon)
This option is used to delete an existing chatbot. Please see below for full functionality.
Register Chatbots
¶ Delete an existing chatbot
You may delete an existing chatbot by clicking on the wastebasket icon on the right below the chatbot. Please follow instructions carefully . Deleting a chatbot is very distructive. It will delete the chatbot together with all of its users, all of its chathistory and all of its associated training documents.
¶ Register users for your default chatbot
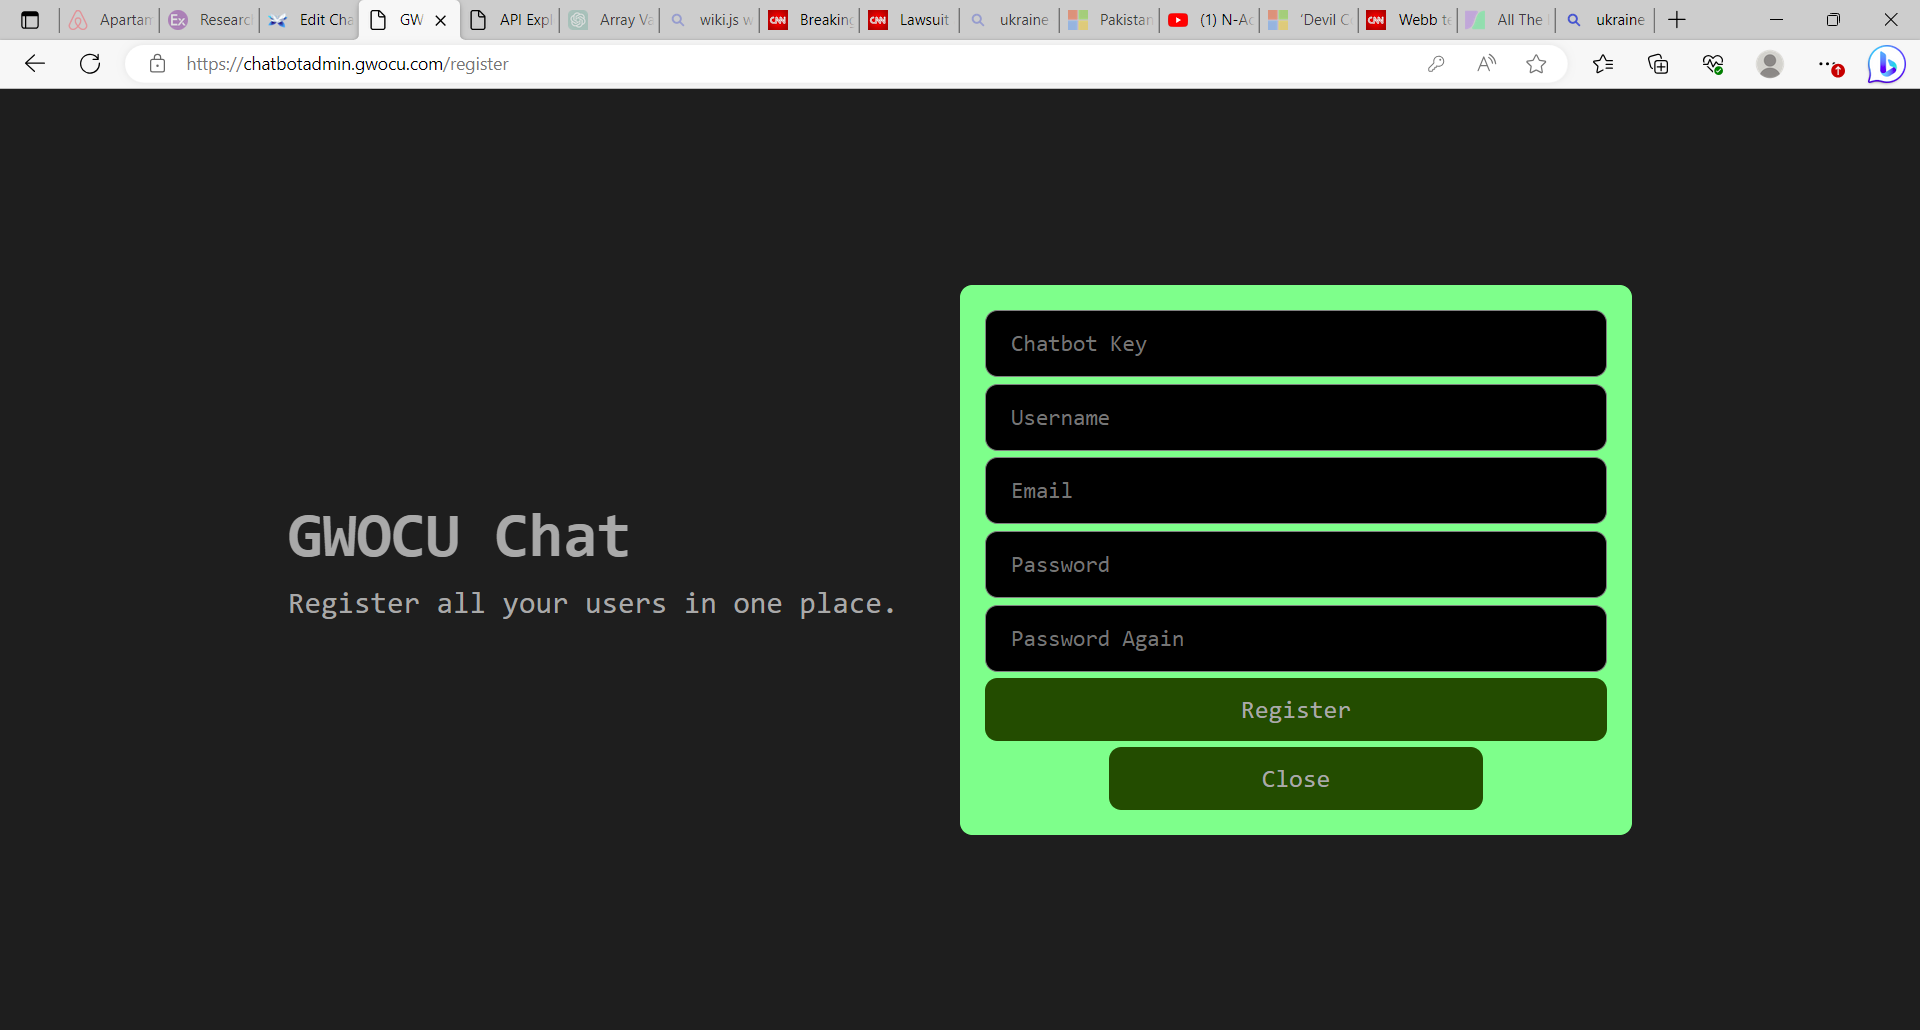
The default chatbot, that is he chatbot that is displayed when you first sign in, has for starters only one user. This is the Admin user. You may create additional users by clicking on the “Register Users” link on the left side panel. You will then be presented with the following screen:

ChatbotKey: The chatbotKey provided to you through email that is associated with your purchased plan.
Username: The name of the user.
Email: The email of the user. The user will use this to sign in.
password: The temporarily assigned password for this user.
Password Again: Please repeat the password
Please press the register button to register the user. Press the close button to close this page and stop registering users. The users that you have registerd will now appear on the left side bar of the main page of the chatbot administrator module.
¶ Delete an existing user
You may delete a user by clicking on the waste basket icon next to the user and follow instructions. The user will no longer be able to sign in into the chatbot administrative module.
¶ Create users for the the other chatbots
If you want to create users for the chatbots that you have created, you must login into each created chatbot using its own chatbot administrative module. After doing that you can create users as usual for that chatbot.